 Save
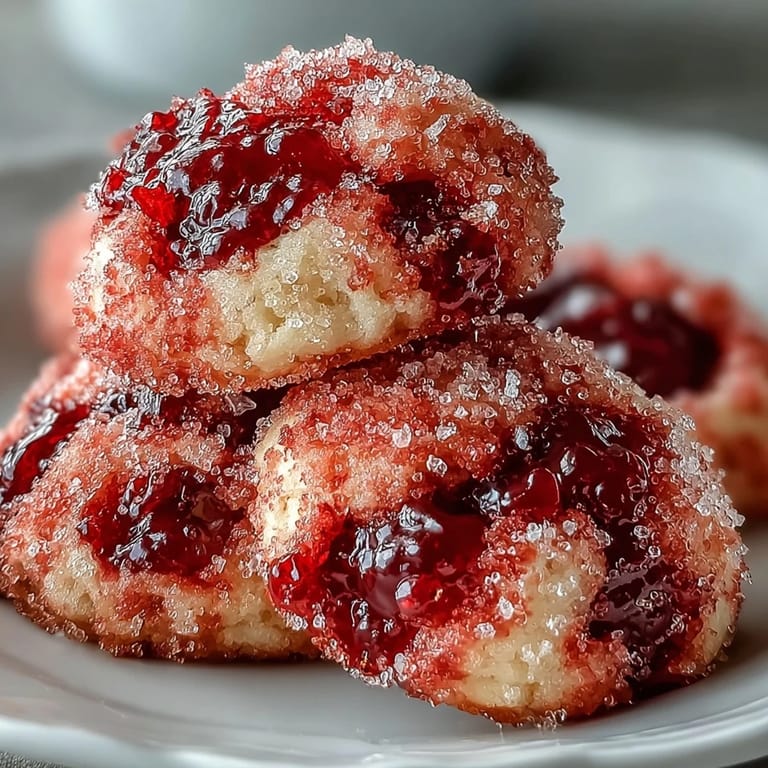
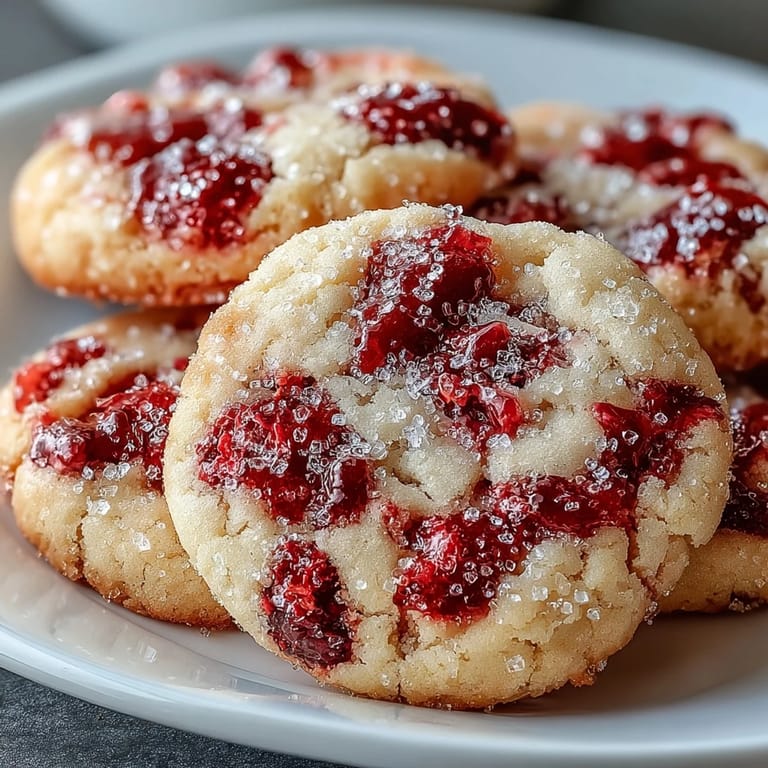
Save My kitchen smelled like butter and vanilla when I pulled the first tray out, but what caught me off guard was the way the raspberries had blistered and burst, leaving little pink trails across the cookie tops. I wasn't sure if I'd ruined them, but one bite told me otherwise. The fruit had turned jammy inside the soft, chewy dough, and the sparkly sugar crust crackled just enough to make each cookie feel special. These became my go-to whenever I wanted something that looked delicate but tasted bold.
I made these for a summer potluck once, and they disappeared faster than anything else on the table. People kept asking if I'd used jam or glaze, surprised when I told them it was just fresh berries folded into basic cookie dough. One friend said they tasted like childhood and sophistication at the same time, which felt like the best compliment I could get. I've been making them ever since, tweaking the raspberry coating until it shimmered just right.
Ingredients
- Unsalted butter, softened to room temperature: This is the backbone of the cookie's tenderness, so make sure it's truly soft but not melted or greasy.
- Granulated sugar and light brown sugar, packed: The blend gives you chew from the brown sugar and crispness from the white, creating that perfect texture balance.
- Large eggs, room temperature: Cold eggs can seize up the butter, so let them sit out for about 30 minutes before you start mixing.
- Vanilla extract: Use pure extract if you can, it deepens the sweetness without competing with the raspberry flavor.
- All-purpose flour: The structure holder, measure it correctly by spooning and leveling to avoid dense cookies.
- Cornstarch: This is the secret to that melt-in-your-mouth softness, it tenderizes the crumb beautifully.
- Baking powder and baking soda: Together they give just enough lift without puffing the cookies into cakes.
- Salt: Balances all the sweetness and makes the raspberry flavor pop.
- Fresh raspberries, gently washed and patted dry: Pat them very dry or they'll bleed too much into the dough, though a little color is actually lovely.
- Crushed freeze-dried raspberries: Optional but worth it for that intense pink hue and concentrated berry flavor in the coating.
Tired of Takeout? 🥡
Get 10 meals you can make faster than delivery arrives. Seriously.
One email. No spam. Unsubscribe anytime.
Instructions
- Prep Your Oven and Pans:
- Preheat to 350°F and line your baking sheets with parchment or silicone mats so the cookies release cleanly. This also helps them bake evenly without burning on the bottom.
- Whisk the Dry Ingredients:
- Combine flour, cornstarch, baking powder, baking soda, and salt in a bowl and set it aside. Whisking now means no lumps later and even distribution of leavening.
- Cream the Butter and Sugars:
- Beat softened butter with both sugars on medium speed for 3 to 4 minutes until pale and fluffy. This step incorporates air, which makes the cookies light and tender.
- Add Eggs and Vanilla:
- Mix in eggs one at a time on low speed, scraping the bowl between additions. Stir in vanilla until the mixture looks smooth and cohesive.
- Incorporate the Flour Mixture:
- Add the dry ingredients gradually on low speed, mixing just until no streaks remain. Overmixing develops gluten and makes cookies tough instead of soft.
- Fold in Fresh Raspberries:
- Use a spatula to gently fold the berries into the dough by hand, being careful not to smash them completely. A few broken ones are fine and add color.
- Prepare the Coating:
- Mix granulated sugar with crushed freeze-dried raspberries in a small bowl. This creates a sparkly, fruity crust that clings to each dough ball.
- Shape and Coat the Dough:
- Scoop 1.5 tablespoon portions, roll them into smooth balls, then roll each in the raspberry sugar mixture. Place them 2 inches apart on your prepared sheets.
- Bake Until Just Set:
- Bake for 10 to 12 minutes until edges are firm but centers still look a little underdone. They'll firm up as they cool and stay chewy inside.
- Cool on the Pan:
- Let cookies rest on the baking sheet for 5 minutes before transferring to a wire rack. This prevents them from breaking apart while they're still soft.
 Save
Save I remember bringing a tin of these to a friend's baby shower, and the mom-to-be said they were the first sweet thing she'd actually wanted in weeks. She tucked the recipe card into her diaper bag and texted me a photo of her toddler covered in pink sugar crumbs a year later. That's when I realized these cookies weren't just dessert, they were little moments people wanted to recreate.
Getting the Perfect Texture
The key to that pillowy chew is not overbaking. Pull them when the centers look barely set and still a little shiny. They'll continue cooking on the hot pan during those 5 minutes of resting, firming up just enough to hold together without losing that soft bite. I learned this after a batch that I left in 2 minutes too long turned out more crisp than I wanted, still good but not the same.
Raspberry Variations
You can swirl a tiny spoonful of raspberry jam into each dough ball before coating for an extra burst of fruit in the center. I've also mixed freeze-dried raspberries directly into the dough when fresh ones weren't in season, and the result was more evenly pink with intense flavor throughout. Both versions have their fans, so it's worth trying each to see which one you love more.
Storage and Make-Ahead Tips
These cookies stay soft and chewy in an airtight container at room temperature for up to 4 days, though they rarely last that long in my house. You can also freeze the dough balls after coating them, then bake straight from frozen by adding 1 to 2 minutes to the baking time.
- Let cookies cool completely before stacking to prevent them from sticking together.
- Freeze baked cookies in a single layer on a tray, then transfer to a freezer bag for up to 3 months.
- Bring frozen cookies to room temperature or warm them in a 300°F oven for a few minutes to refresh that just-baked softness.
 Save
Save Every time I pull a tray of these from the oven, I'm reminded that the best recipes are the ones that surprise you with how simple they are to make and how much joy they bring. Keep a bag of freeze-dried raspberries in your pantry, and you'll always be ready to whip up a batch that feels special.
Questions & Answers
- → Can I use frozen raspberries instead of fresh?
Fresh raspberries work best as frozen ones release excess moisture that can make the dough too wet. If using frozen, thaw completely and pat dry thoroughly before folding into the dough, or reduce the quantity slightly to maintain proper dough consistency.
- → Why do the centers look slightly underbaked?
The centers should appear slightly underbaked when you remove them from the oven. This ensures the cookies stay soft and chewy as they cool on the baking sheet during the 5-minute resting period. They'll continue setting without becoming hard or dry.
- → Can I make the dough ahead of time?
Absolutely! Chill the dough for 30 minutes before baking for better shape retention, or refrigerate overnight for deeper flavor development. Let chilled dough sit at room temperature for 10-15 minutes before scooping and baking.
- → What if I don't have freeze-dried raspberries?
The freeze-dried raspberries are optional for the coating. You can simply roll the cookies in granulated sugar alone, or mix in a little lemon zest for extra brightness. The fresh raspberries inside already provide plenty of fruity flavor.
- → How do I prevent the raspberries from bleeding too much?
Gently wash and thoroughly pat the raspberries dry before adding them to the dough. Fold them in by hand at the very end, mixing just until distributed. Avoid overmixing, which can crush the berries and release excess moisture into the dough.
- → Can I substitute the all-purpose flour?
While you can experiment with gluten-free flour blends, the texture and structure may differ. For best results, use regular all-purpose flour. If adapting for gluten-free, choose a 1:1 baking blend specifically designed for cookies and expect slightly different results.