 Save
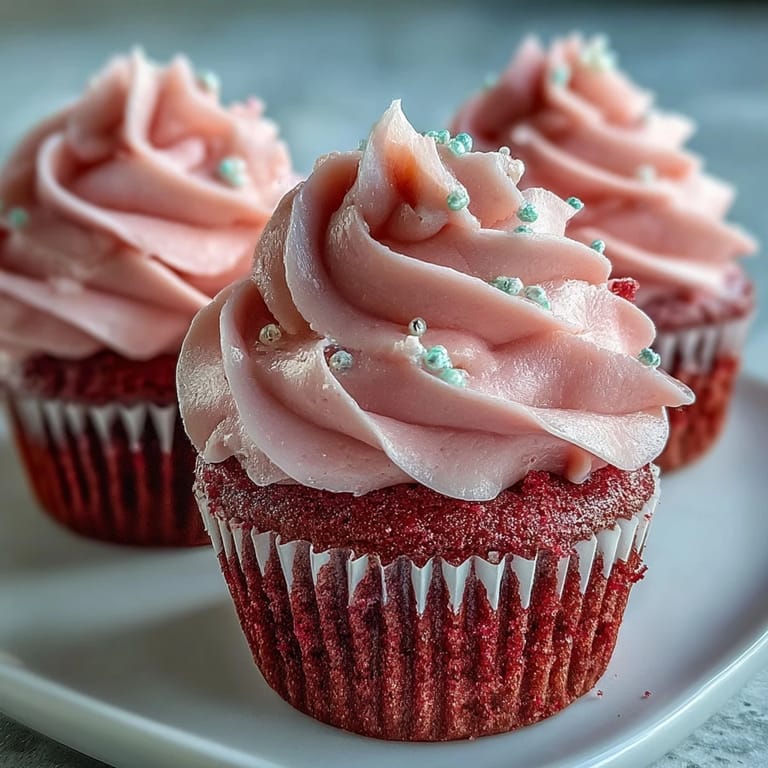
Save My cousin walked into the kitchen one Saturday morning and asked if we could make something pink and fancy without diving into the red velvet chaos. We rummaged through the pantry, pulled out gel food coloring, and decided to lighten things up with a blush-toned batter that tasted like clouds. The first batch came out so soft and pretty that she snapped a photo before I even finished frosting them. That spontaneous baking session turned into my go-to cupcake recipe whenever someone craves something sweet, simple, and just a little bit whimsical.
I made these for a friend's baby shower last spring, and the pastel shade matched her decorations without me even trying. She kept saying they looked too pretty to eat, but then she ate three. The room smelled like vanilla and butter, and everyone hovered around the kitchen island, frosting tips in hand, trying to perfect their swirls. It became less about the party and more about the laughter over lopsided peaks and stolen tastes of buttercream.
Ingredients
- Cake flour: This keeps the cupcakes light and airy, but if you only have all-purpose, sift in a little cornstarch to mimic that delicate texture.
- Baking powder and baking soda: The duo gives you that perfect rise and a hint of tang when combined with buttermilk.
- Unsalted butter: Room temperature is non-negotiable here; cold butter won't cream properly and warm butter turns the batter greasy.
- Granulated sugar: It dissolves into the butter, creating those tiny air pockets that make each bite tender.
- Egg: One large egg binds everything together and adds richness without weighing down the crumb.
- Buttermilk: The subtle acidity reacts with the leaveners and keeps the cupcakes moist for days.
- Pure vanilla extract: A teaspoon goes a long way; it adds warmth and depth to both the cake and the frosting.
- White vinegar: Just a teaspoon mixed with the food coloring helps activate the baking soda and keeps the color vibrant.
- Pink gel food coloring: Gel is more concentrated than liquid, so you control the shade without adding extra moisture.
- Powdered sugar: Sifted sugar makes the buttercream silky and lump-free, and you can adjust the amount to get your preferred sweetness.
- Heavy cream or whole milk: A splash loosens the frosting just enough to pipe beautifully without it being runny.
Tired of Takeout? 🥡
Get 10 meals you can make faster than delivery arrives. Seriously.
One email. No spam. Unsubscribe anytime.
Instructions
- Prep your pan:
- Line that muffin tin with paper liners and preheat the oven to 350°F. A preheated oven ensures even baking and a consistent rise.
- Sift the dry ingredients:
- Whisk together the flour, baking powder, baking soda, and salt in a medium bowl. Sifting prevents lumps and makes the cupcakes extra fluffy.
- Cream the butter and sugar:
- Beat the room-temperature butter until smooth, then add the sugar gradually and beat for 2 to 3 minutes. The mixture should look pale and fluffy, almost like frosting.
- Add the egg and vanilla:
- Lightly beat the egg in a small bowl, then pour it into the butter mixture on low speed until fully blended. Stir in the vanilla extract for that classic bakery aroma.
- Alternate dry and wet ingredients:
- Add one-third of the dry mix, then half the buttermilk, then another third of dry, the rest of the buttermilk, and finish with the last of the dry ingredients. Scrape down the bowl between additions and mix just until combined to avoid a tough crumb.
- Tint the batter:
- Stir the vinegar and pink gel coloring together in a small cup, then pour it into the batter on low speed. Mix until the color is even and the batter is a soft blush pink.
- Fill and bake:
- Divide the batter evenly among the liners, filling each about two-thirds full, and tap the pan gently on the counter to pop any air bubbles. Bake for 18 to 22 minutes, checking with a toothpick for moist crumbs or a clean exit.
- Cool completely:
- Let the cupcakes rest in the pan for 5 minutes, then move them to a wire rack. Frosting warm cupcakes will melt the buttercream into a puddle.
- Make the buttercream:
- Beat the butter until creamy, then add powdered sugar gradually on low speed. Once combined, increase to medium and beat for 2 minutes, then add vanilla, cream, and a pinch of salt and whip on medium-high until light and fluffy.
- Frost and decorate:
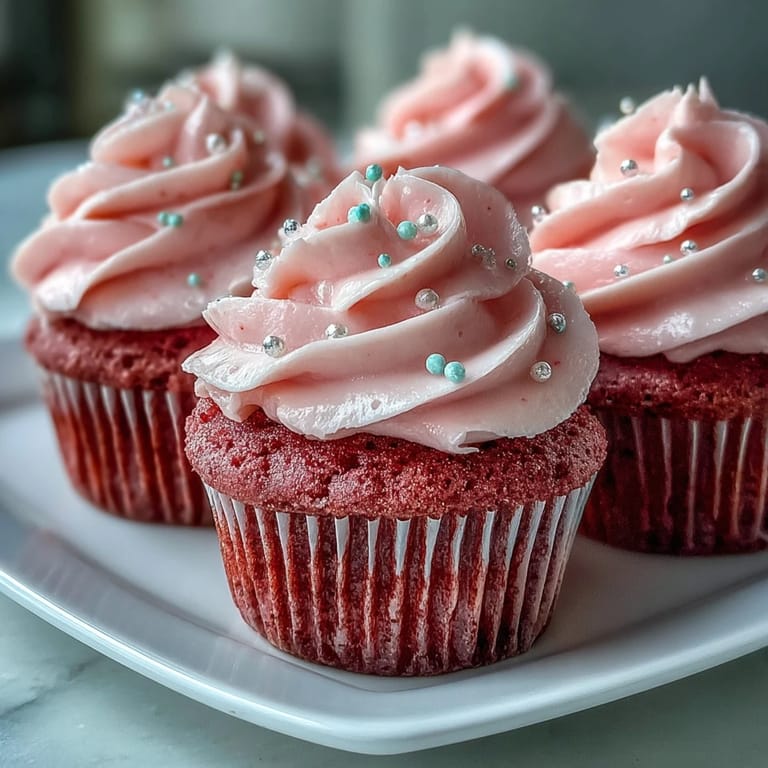
- Transfer the buttercream to a piping bag or use a small spatula to swirl it onto each cupcake. Finish with sprinkles, edible pearls, or pink sanding sugar if you want a little extra sparkle.
 Save
Save These cupcakes showed up at a coworker's going-away party, and someone said they tasted like the kind of dessert you'd find at a boutique bakery. I didn't have the heart to tell them I'd made the frosting in my pajamas while listening to a podcast. That quiet pride, knowing something homemade could feel that special, stuck with me long after the last cupcake was gone.
Storing and Serving
Frosted cupcakes keep well in an airtight container at cool room temperature for up to two days, though they rarely last that long in my house. If you need to make them ahead, bake and cool the cupcakes, then wrap them tightly and store them unfrosted in the fridge for up to three days or freeze them for up to a month. Frost them the day you plan to serve for the freshest taste and prettiest swirls.
Customizing the Flavor
If you want to swap the vanilla buttercream for something different, try a hint of almond extract or a swirl of raspberry jam between the cake and frosting. I've also folded in a tablespoon of freeze-dried strawberry powder to the buttercream for a subtle berry note that pairs beautifully with the pink hue. You can even leave the food coloring out entirely and let the natural cream color shine if you prefer a more understated look.
Troubleshooting Common Issues
If your cupcakes dome too much or crack on top, your oven might be running hot; try lowering the temperature by 10 degrees next time. Sunken centers usually mean underbaking or opening the oven door too early, so resist the urge to peek until at least 15 minutes in. If the buttercream feels too soft to pipe, pop it in the fridge for 10 minutes to firm up, and if it's too stiff, add a teaspoon of cream at a time until it loosens.
- Use an oven thermometer to confirm your oven's accuracy.
- Fill liners evenly with a cookie scoop for uniform cupcakes.
- Always sift powdered sugar to avoid gritty frosting.
 Save
Save These pink velvet cupcakes have become my answer to every celebration, big or small, and they never fail to make people smile. I hope they bring a little sweetness and a lot of joy to your kitchen too.
Questions & Answers
- → What gives pink velvet cupcakes their distinctive texture?
The combination of buttermilk, white vinegar, and cake flour creates the signature tender, velvety crumb. The acidity activates the baking soda for extra lift while keeping the texture exceptionally moist and soft.
- → Can I use natural food coloring instead of gel?
Absolutely! Beet powder works wonderfully for a natural pink hue. Start with ½ teaspoon and adjust to achieve your desired shade. Keep in mind natural coloring may produce a softer, more muted pink compared to vibrant gel colors.
- → How should I store frosted pink velvet cupcakes?
Store frosted cupcakes in an airtight container at cool room temperature for up to 2 days. For longer storage, refrigerate for up to 4 days, though bring them to room temperature before serving for the best texture and flavor.
- → What's the difference between pink velvet and red velvet?
Pink velvet focuses on the beautiful blush color without requiring the massive amount of red food coloring typical in red velvet. Both share the same tender buttermilk-based foundation and subtle tanginess, but pink velvet offers a lighter, more delicate appearance perfect for spring and summer celebrations.
- → Can I make these into mini cupcakes?
Yes! Fill mini liners halfway and bake for 10–12 minutes. This recipe will yield approximately 24–30 mini cupcakes. Watch them closely at the 10-minute mark, as smaller portions bake faster. The same delicious texture and flavor shine in bite-sized form.
- → Why is room-temperature ingredients important?
Room-temperature butter, eggs, and buttermilk emulsify properly, creating a uniform batter that traps air for better rise. Cold ingredients can cause the butter to seize, leading to dense or uneven cupcakes. Set everything out 30–60 minutes before baking for best results.