 Save
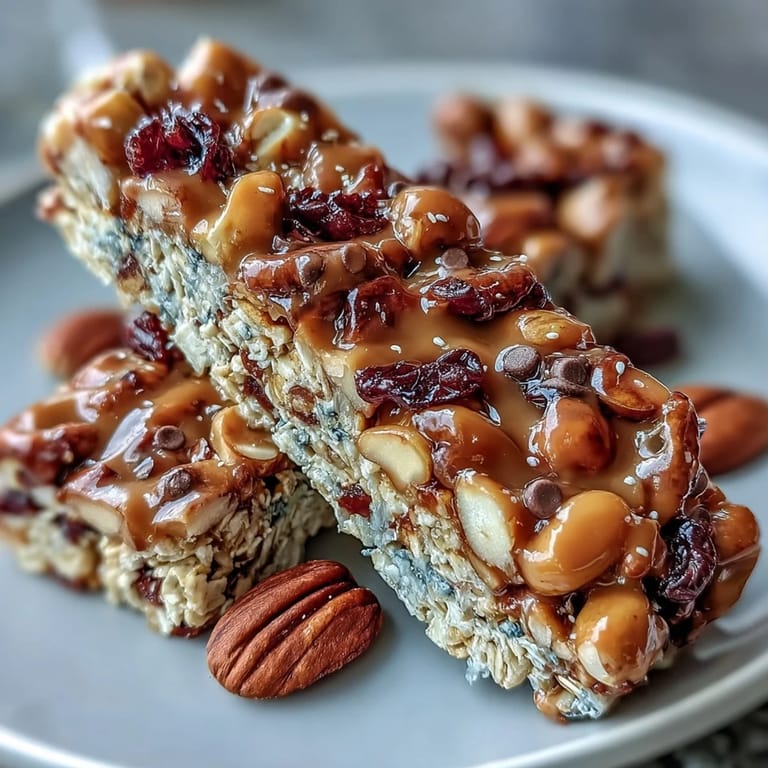
Save My neighbor showed up at my door one Saturday morning with a container of homemade energy bars, still soft and slightly warm from her kitchen. She'd made them for a hiking trip but had extras, and after one bite, I understood why she'd been raving about them all week. No oven required, just a bowl, a pan, and about fifteen minutes of actual work—the kind of recipe that feels like cheating because it tastes too good to be this easy. I've been making them ever since, tweaking the mix-ins based on whatever's lurking in my pantry, and they've become my go-to answer when someone asks, "What can I bring?"
I made these for the first time right before a camping trip, and honestly, I was skeptical that they'd hold together without being baked. But there they were at the end of a long hike, still intact, still delicious, and somehow tasting even better when eaten at a picnic table with a view. My friends started asking why store-bought bars suddenly seemed so stale and artificial by comparison. That's when I realized I'd accidentally stumbled onto something that would become a regular fixture in my hiking backpack.
Ingredients
- Old-fashioned rolled oats (2 cups): The backbone of these bars—they provide chewiness and substance, so don't swap in instant oats or steel-cut varieties, which will change the texture completely.
- Crisp rice cereal (1 cup): This adds a light, almost crispy contrast to the chewy oats and keeps the bars from feeling dense.
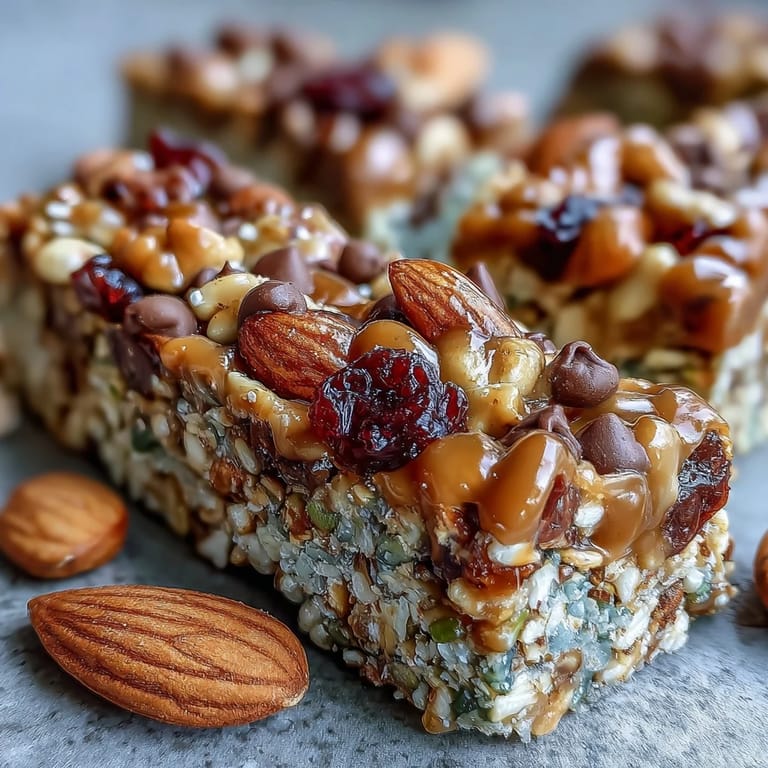
- Mixed nuts, chopped (1/2 cup): Almonds, walnuts, and pecans all work beautifully, and chopping them into varied sizes keeps things interesting texture-wise.
- Dried fruit (1/2 cup): Cranberries, raisins, apricots, or even dates bring natural sweetness and a little chew; avoid anything with added sugar if you're watching your intake.
- Unsweetened shredded coconut (1/4 cup, optional): A small amount adds tropical flavor without overpowering the rest, and it creates an almost tropical undertone.
- Salt (1/4 teaspoon): This tiny amount brings out the nuttiness and balances all that sweetness—don't skip it.
- Honey or maple syrup (1/2 cup): Honey gives a more neutral sweetness, while maple syrup adds a subtle earthiness; both work equally well.
- Peanut butter or almond butter (1/3 cup): This is your binding agent and flavor anchor, so use something creamy and smooth rather than natural, which can separate.
- Vanilla extract (1 teaspoon): A small amount that somehow makes everything taste more like itself.
- Mini chocolate chips (1/4 cup, optional): Add them after cooling slightly so they don't melt into the mixture, or skip them entirely for a lighter bar.
- Chia seeds or flaxseed meal (1 tablespoon, optional): These add a subtle nuttiness and boost the protein content if you're into that.
Tired of Takeout? 🥡
Get 10 meals you can make faster than delivery arrives. Seriously.
One email. No spam. Unsubscribe anytime.
Instructions
- Prepare your pan:
- Line an 8-inch square baking pan with parchment paper, letting the edges overhang—this makes removal effortless later. Think of it as creating an escape route for your finished bars.
- Combine the dry ingredients:
- In a large bowl, mix together the oats, rice cereal, nuts, dried fruit, coconut (if using), and salt until everything is evenly distributed. This is your foundation, and taking a moment here ensures no ingredient gets lost.
- Heat the binding mixture:
- In a small saucepan over low heat, combine honey and peanut butter, stirring constantly for 2-3 minutes until the texture is smooth and pourable. You want it warm but not bubbling—just warm enough to flow easily through the dry mixture.
- Add the vanilla:
- Remove the pan from heat and stir in vanilla extract, letting it meld into the warm mixture. The aroma that hits you here is worth the whole project.
- Bring it all together:
- Pour the warm wet mixture over the dry ingredients and stir thoroughly, making sure every oat and nut gets coated in the honey-peanut butter base. This takes patience, but rushing it means you'll end up with dry pockets later.
- Add chocolate chips carefully:
- If using chocolate chips, wait 2-3 minutes for the mixture to cool slightly before folding them in to prevent melting. Alternatively, save them for sprinkling on top.
- Press into the pan:
- Transfer the mixture to your prepared pan and press firmly and evenly with a spatula or the back of a measuring cup, working from the center outward. You want enough pressure that the bars will hold together, but don't compact so hard that they become dense and chewy to the point of being tough.
- Finish with toppings:
- Sprinkle additional chocolate chips, nuts, or seeds on top if desired, pressing them gently into the surface so they stick when the bars chill. This is where you can make them look intentional and pretty.
- Chill and set:
- Refrigerate for at least 1 hour, preferably 75 minutes, until the bars are firm enough to cut cleanly without crumbling. The honey and peanut butter need time to set and bind everything together.
- Cut and store:
- Use the parchment overhang to lift the entire slab from the pan, then use a sharp knife to cut into 12 bars. Store in an airtight container in the refrigerator for up to a week, or freeze for longer storage.
 Save
Save There's a moment during the chilling process when you peek into the fridge and see these bars setting up, and you know that in less than an hour, you'll have made something substantial without turning on your oven or dirtying more than a couple of pans. It's the kind of small kitchen victory that feels bigger than it should, especially when you bite into one the next morning and find exactly the texture and flavor you were hoping for. That's when I realized these bars are more than just convenient—they're genuinely delicious, which is the best kind of accident.
Why No-Bake Is the Perfect Approach
There's something calming about a recipe that doesn't require heating your kitchen or setting a timer, especially during warmer months when you're already fighting to keep things cool. The binding happens through chilling rather than heat, which means you get to see the transformation happen gradually in your refrigerator instead of racing against a ticking clock. I love making these on a lazy afternoon when I want to feel productive without actually committing much energy to the process.
Customization Beyond the Basics
Once you make these once, you'll start seeing possibilities everywhere—different nut butters if you're avoiding peanuts, spices like cinnamon or cardamom swirled through for warmth, or dark chocolate chips instead of milk chocolate for sophistication. I've made vegan versions using maple syrup and dairy-free chocolate, and they're absolutely indistinguishable from the original. The real magic is that the basic structure is so forgiving that you can swap almost anything and still end up with a delicious bar.
- Sunflower seed butter works beautifully for anyone avoiding peanuts, and it brings an almost creamy, different kind of richness.
- Dates, figs, or chopped mango can replace traditional dried fruit if you want something more sophisticated or seasonal.
- A pinch of sea salt sprinkled on top after pressing the mixture into the pan creates a sweet-salty contrast that feels like a deliberate choice.
When to Make These and How to Pack Them
I make a batch every couple of weeks if I'm doing anything outdoors—hiking, picnics, road trips, or even just long days at work when I want something more substantial than a granola bar from the store. They travel beautifully in parchment paper or wrapped individually in wax paper, staying fresh in an insulated lunch bag for hours without refrigeration, though they do hold their shape best when kept cool. The fact that they don't require any special packaging or equipment makes them the kind of snack you can pull together when you realize you're leaving in an hour and have nothing packed.
Storage and Longevity
These bars keep in the refrigerator for a solid week in an airtight container, staying chewy and fresh without any flavor degradation or texture changes. If you want them to last longer, wrap individual bars tightly in plastic wrap or parchment and freeze them—they thaw perfectly at room temperature in about thirty minutes, or you can eat them straight from the freezer on a hot day for a nice texture change. I've pulled frozen bars from the freezer at 6 AM and had them thawed and ready by the time I needed a snack mid-morning, so this is genuinely a make-ahead recipe.
- Keep them in the coldest part of your refrigerator, away from anything with a strong smell, since they can absorb flavors easily.
- If your kitchen is particularly warm, err on the side of chilling them longer than an hour to ensure they're completely set before cutting.
- Individual wrapping takes ten extra minutes but makes portion control and grab-and-go eating infinitely easier.
 Save
Save These bars have become my answer to the question of what to bring when someone invites me somewhere, and they're somehow even better when shared with people who didn't expect homemade snacks to be this easy. They're proof that the best recipes don't need fancy equipment or hours of time—just good ingredients and a little patience.
Questions & Answers
- → How can I make these bars nut-free?
Replace the peanut or almond butter with sunflower seed butter and omit mixed nuts to create a nut-free version suitable for allergy concerns.
- → Can I use different sweeteners instead of honey?
Yes, maple syrup is a great vegan alternative that provides similar sweetness and binding properties without changing the texture.
- → What texture should I expect from these bars?
The bars are chewy and slightly firm after chilling, with a satisfying bite from oats, nuts, and dried fruit, balanced by smooth nut butter.
- → Are there any tips for pressing the mixture into the pan?
Use a spatula or the back of a flat-bottomed cup to press the mixture evenly and firmly into the pan to help the bars hold together well.
- → Can I add spices to enhance flavor?
Absolutely! Adding cinnamon, cardamom, or other warm spices can deepen the flavor profile and complement the sweetness of the bars.
- → How long should I chill the bars before cutting?
Chilling for at least one hour in the refrigerator allows the bars to set properly for clean slicing and optimal texture.